 |
| Photo by Marie Mack |
We had just moved to a brand-new town, again, with a baby just 10 months old. He was curious, smart, and on the go. A resounding question haunted my thoughts as a stay-at-home Mom. What do I do with him? How do I teach him? Where do I go from here?
The Montessori Method flooded my reading material and conversations. I knew where Maria Montessori was from, why she started observing children, and how her methods had changed the way humans thought of the youngest of us. I was sold on the idea that my child would learn about his environment best through this method. But how to start?
Setting up our house to be a Montessori house was one of the hardest things to do. I scoured the internet and found a small home video on YouTube. The mom seemed young to me and lived in a small home that I probably could have fit in my living room. I was humbled at the things she had done for her son and wanted to mimic the same small details for Samuel.
I hope to blog three parts to this series and cover how our playroom, the kids’ room, and a couple other small areas around our home are set up.
First, let's check out our playroom.
 |
| Photo by Marie Mack |
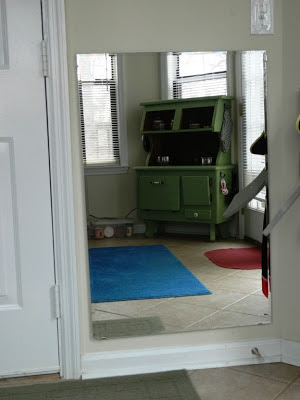
We started with a couple rugs. I found the large one at Kmart during an after-season sale. I just priced them recently for about $$. The other two were cheap as well. They help Avalyn a lot with traction and give our room a little warmth and color.
The windows are so great in this room. I chose to put the playroom in what should be a breakfast nook, because of the windows. This seems to be an older house so the windows themselves are not great, but the natural light is irreplaceable. The first thing I do in the morning is open the blinds to let in the light. I love seeing my kids playing in natural light and helping them to notice the trees and birds outside. Putting a play area next to a window is one of the first choices I make when we move into a new place.
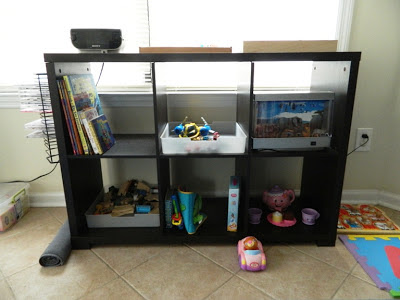
I am always on the lookout for a good, sturdy bookshelf. This one is from Target and is not made very well. We chose to leave it off the back panel so it can be used in different ways at different houses. I love the squares. It is nice to have specific places for activities and books. Almost everything on our bookshelf was given to us as presents. I have been very blessed with amazing in-laws and have loving family and friends who love to pass on wonderful books and toys. My husband attached a small CD rack to the side of our bookshelf to organize the growing CD collection the kids have. Beside our bookshelf is our work mat. It is actually a bath mat without the rubber on the back. I found it at IKEA for less than $$. The activities on the lowest shelves are for Avalyn mostly and the upper shelves are for Samuel mostly. Both kids play with everything pretty consistently.
 |
| Photo by Marie Mack |
This post was originally published at Montessori on a Budget. This is my most
popular series!
Linking up with Montessori Monday at Living Montessori Now


